


How to create a completely custom, bootable Windows XP installation disc with applications, tweaks, patches. You can remove what you do not want from XP, change default settings, add SPs and certain Windows Updates. You can also create unattended setup for re-installation.
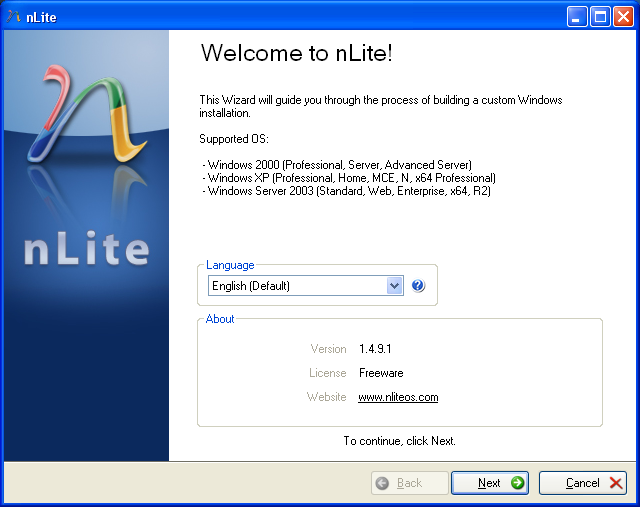
The opening screen will show you what OS are supported, and give you the choice of language you want for the rest of the process. At this point you will want to insert your XP disc into a drive and close any auto option that appears. Hit Next.

Browse to the XP disc, and select it. You will now need to pick a folder to backup the OS files to. I made a new folder on the Desktop called Backup and saved it there. Let the process run. It shouldn't take longer than a few minutes.
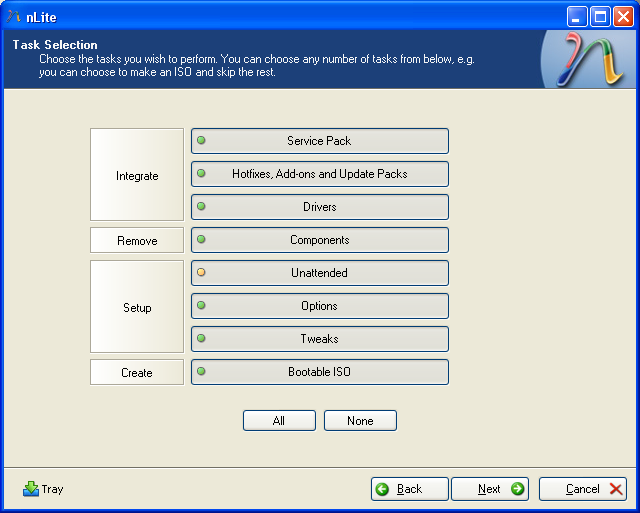
The next part is Task Selection. Here you have the option to choose what you would like added or removed from ISO we are building. I would choose ALL here. Hit Next.
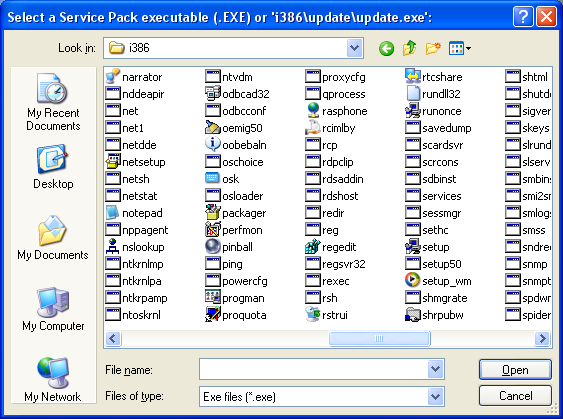
The next step is integration of the Service Pack. Navigate to where you saved the SP before and load it. If you already have it installed, navigate to the folder in the screenshot and add it that way. You will be looking for the Update.exe. Hit Next.
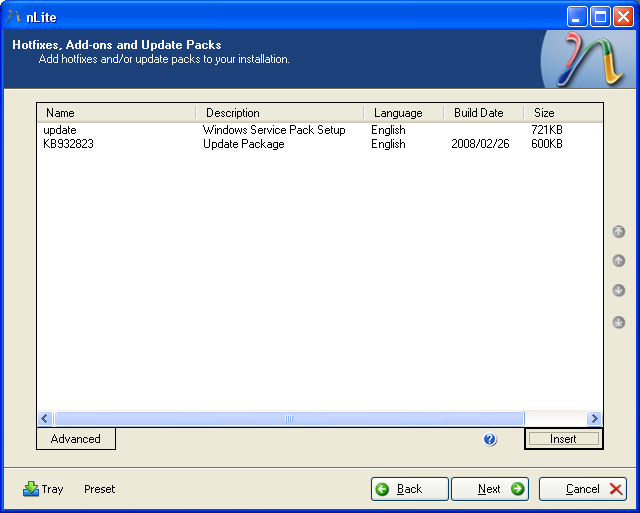
Hit Insert and begin searching for an updates or hotfixes you may want to add. There could be hundreds. This process could be made easier by heading to Windows Updates and manually downloading the hotfixes you want into a folder of your choice. Microsoft makes it very hard to find them otherwise. Once you are done, hit Next.
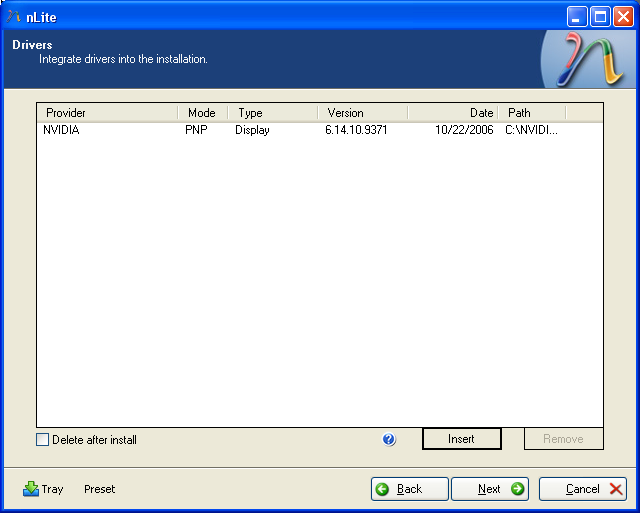
In the Drivers screen, you can add any drivers that you may want to bypass later. In this situation, you will want to find only mass media controller drivers (such as SATA, IDE or SCSI drivers). Doing so will provide your computer with the necessary components to have a smooth running HDD or other mass media device after a reformat. To make this process easier as well, you will want to insert any systems drivers disc you may have, and copy the drivers to an easy to find location, perhaps the desktop.

The Components page is important and allows you to select anything you want removed. For example, I do not need to have any games on my computer, so I removed them. There are many options so make sure to delete what you do not want. Good chances are if you don't understand what the component does, you should probably not mess with it. nLite will give you warnings if something is critical and should certainly not be removed.
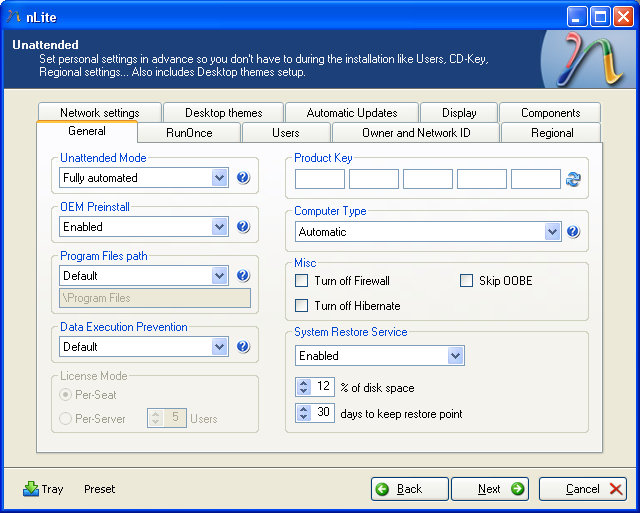
This is the really important part, or at least the most interesting. From this menu you can turn your disc into an unattended install. In the General tab you can enter your license key, turn on system restore, and set the install to unattended. You will also want to Skip OOBE.
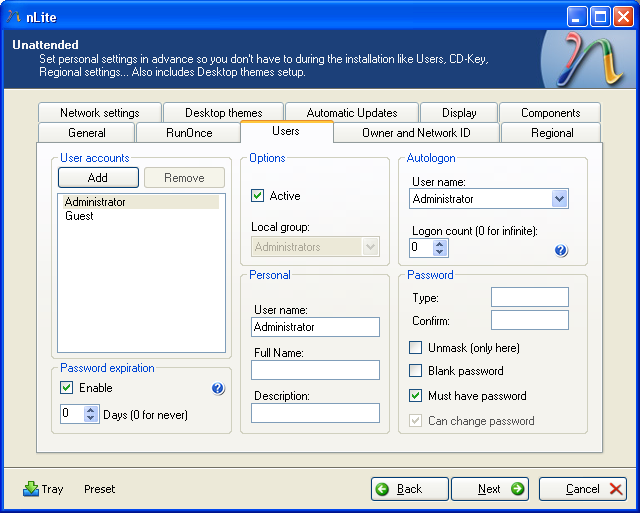
Head to the Users tab and create a Password for your administrator account. This is important so make sure the password is secure and you remember it. You can also change the title of Admin to whatever you want, like "Boss" or even your own name. It will still be the full rights administrator account though.
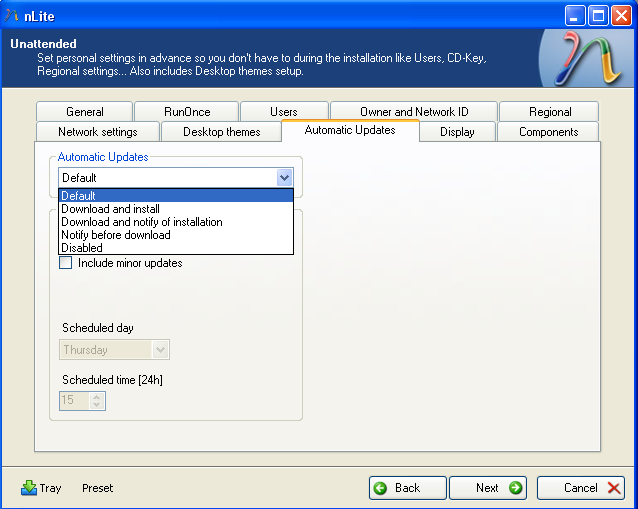
Under Automatic Updates tab, you can select how you want your updates, either manual, automatic, and when as well.
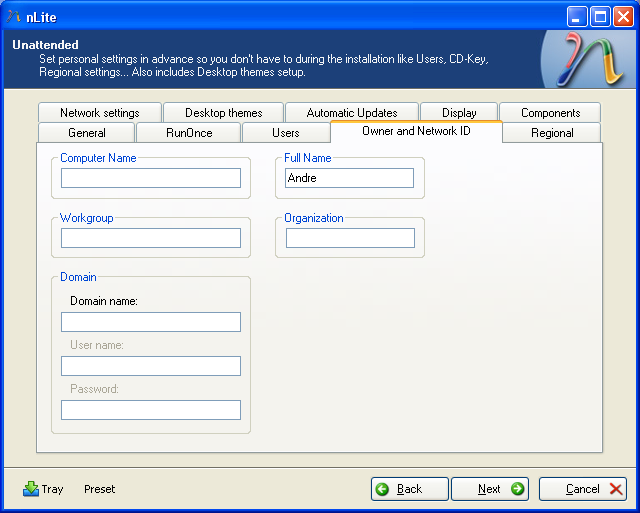
Under the Owner tab, you will need to add a name and a computer name to proceed.
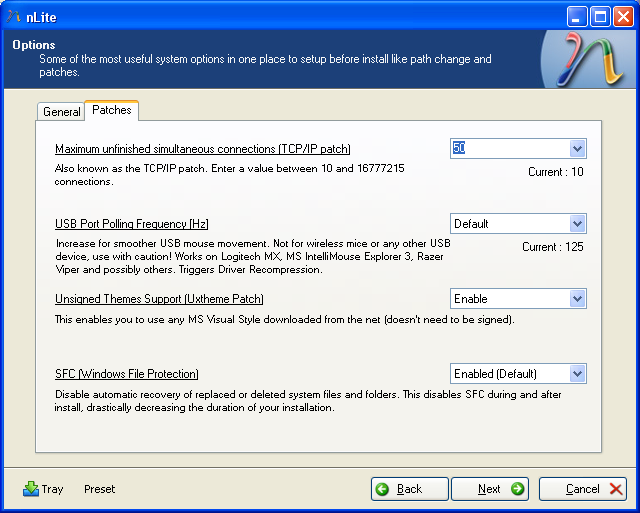
Under Patches, you will want to up the TCP/IP connections, because 10 is too little. 50 is a good number, especially if you use torrents.
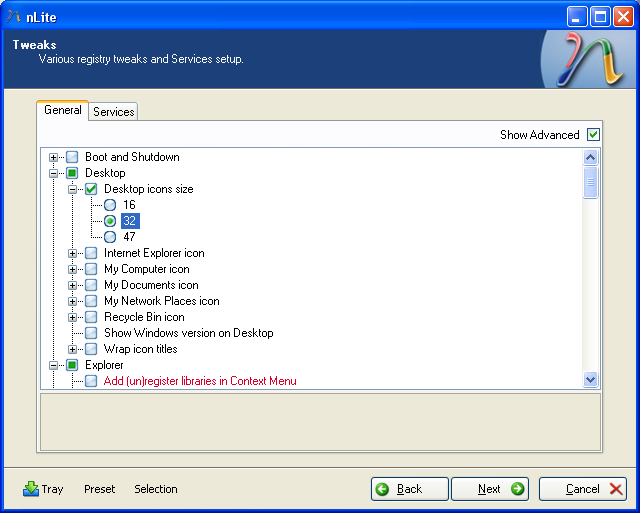
Under Tweaks, you can perform a lot of the small "tweaks" you would want to do later, such as icon size, locking the taskbar, skipping privacy statements on IE or WMP, and much more. Look through all the options thoroughly. Hit Next and then Yes. The process will begin.

The last step is to make the new image into a bootable disc. Hit Create Image and then finally Make ISO. This time varies as well. When it is done, follow this guide to burn your image to a disc.
Burning images with IMGBurn- In this quick guide you will learn how to use the excellent freeware program ImgBurn to burn image files to a blank CD or DVD. This program was designed from the ashes of DVD Decrypter and is actually updated unlike Decrypter so therefore I would recommend upgrading to ImgBurn, especially if you are not in the business of ripping content that should not be ripped.
| nLite | |
| Required: Please download nLite here and install it. Download! | |
| Windows XP SP3 | |
| Optional: Please download XP SP3 here if you do not already have it. You will need authorized OS to get it. Download! |
Getting Started
The opening screen will show you what OS are supported, and give you the choice of language you want for the rest of the process. At this point you will want to insert your XP disc into a drive and close any auto option that appears. Hit Next.
Browse to the XP disc, and select it. You will now need to pick a folder to backup the OS files to. I made a new folder on the Desktop called Backup and saved it there. Let the process run. It shouldn't take longer than a few minutes.
Task Selection
The next part is Task Selection. Here you have the option to choose what you would like added or removed from ISO we are building. I would choose ALL here. Hit Next.
Service Pack
The next step is integration of the Service Pack. Navigate to where you saved the SP before and load it. If you already have it installed, navigate to the folder in the screenshot and add it that way. You will be looking for the Update.exe. Hit Next.
Hotfixes
Hit Insert and begin searching for an updates or hotfixes you may want to add. There could be hundreds. This process could be made easier by heading to Windows Updates and manually downloading the hotfixes you want into a folder of your choice. Microsoft makes it very hard to find them otherwise. Once you are done, hit Next.
Drivers
In the Drivers screen, you can add any drivers that you may want to bypass later. In this situation, you will want to find only mass media controller drivers (such as SATA, IDE or SCSI drivers). Doing so will provide your computer with the necessary components to have a smooth running HDD or other mass media device after a reformat. To make this process easier as well, you will want to insert any systems drivers disc you may have, and copy the drivers to an easy to find location, perhaps the desktop.
Components
The Components page is important and allows you to select anything you want removed. For example, I do not need to have any games on my computer, so I removed them. There are many options so make sure to delete what you do not want. Good chances are if you don't understand what the component does, you should probably not mess with it. nLite will give you warnings if something is critical and should certainly not be removed.
Unattended
This is the really important part, or at least the most interesting. From this menu you can turn your disc into an unattended install. In the General tab you can enter your license key, turn on system restore, and set the install to unattended. You will also want to Skip OOBE.
Head to the Users tab and create a Password for your administrator account. This is important so make sure the password is secure and you remember it. You can also change the title of Admin to whatever you want, like "Boss" or even your own name. It will still be the full rights administrator account though.
Under Automatic Updates tab, you can select how you want your updates, either manual, automatic, and when as well.
Under the Owner tab, you will need to add a name and a computer name to proceed.
Patches
Under Patches, you will want to up the TCP/IP connections, because 10 is too little. 50 is a good number, especially if you use torrents.
Tweaks
Under Tweaks, you can perform a lot of the small "tweaks" you would want to do later, such as icon size, locking the taskbar, skipping privacy statements on IE or WMP, and much more. Look through all the options thoroughly. Hit Next and then Yes. The process will begin.
The last step is to make the new image into a bootable disc. Hit Create Image and then finally Make ISO. This time varies as well. When it is done, follow this guide to burn your image to a disc.
Burning images with IMGBurn- In this quick guide you will learn how to use the excellent freeware program ImgBurn to burn image files to a blank CD or DVD. This program was designed from the ashes of DVD Decrypter and is actually updated unlike Decrypter so therefore I would recommend upgrading to ImgBurn, especially if you are not in the business of ripping content that should not be ripped.


0 comments:
Post a Comment